
A few months back, I contacted McNab Alpine to enquire about availability on any of their advertised "Zermatt Ten 4000m" trips. Several weeks later, I heard back advising there was a space available should I want it. I quickly confirmed, "Yes".
The aim of the trip, “to summit ten spectacular 4000m summits in one week!”
On our trip, we successfully summited only five 4000m peaks, as bad weather unfortunately impacted our itinerary. However, the ascent of the Zermatt “five” was still a fantastic adventure, which starts here should you wish to read on …
Part 1 of 4 : Ascent of the Weissmies (4017m)
On Monday 9th July, I flew from Aberdeen to Geneva, via Frankfurt, and then travelled by coach from Geneva to Argentiere to reach McNab Alpine’s White Chalet. As the flight approached Geneva, it was great to see the Alps from above.
Bernese Alps from flight into Geneva:

Mont Blanc from flight into Geneva:

On the coach transfer to Argentiere, I met Mark. On arriving in Argentiere, I also met Iain and Chris, and Poldo our mountain guide.
Once settled into the chalet, we were treated to a fantastic meal. Following some discussion about what gear to take, I ventured out for a walk around Argentiere before retiring to bed.
Argentiere at night:

The next morning, I spent some time admiring the views from the balcony of our chalet.
View from Chalet balcony (zoom):

View from Chalet balcony (zoom):

View from Chalet balcony (zoom):
After a good breakfast, we were packed and ready to go.
Poldo, Mark, myself, Chris and Iain:

Poldo drove our group from Argentiere to Saas-Grund for the ascent of our first peak, the Weissmies. On arriving in Saas-Grund, we took the cable car from Saas-Grund up to Kreuzboden (2400m).
Cable Car from Saas-Grund to Kreuzboden:

We could have taken the cable car almost 800m further up the mountain to Hohsaas. Instead we enjoyed the walk up from Kreuzboden to Hohsaas; good for acclimitisation. Our ascent from Kreuzboden to Hohsaas would take us up past the Weissmies hut.
View from Kreuzboden:

Weissmies Hut from Kreuzboden (zoom):

Ascent from Kreuzboden:

Looking back to Kreuzboden and across to cloud-covered Dom:

It didn’t take long to reach the Weissmies hut, where we stopped for a short break.
Approaching the Weissmies hut:

At the Weissmies hut:
On reaching the Weissmies hut, it looked like rain was fast approaching, so we doubled our speed to reach the Hohsaas hut.
Ascent from Weissmies hut towards Hohsaas cable car station:

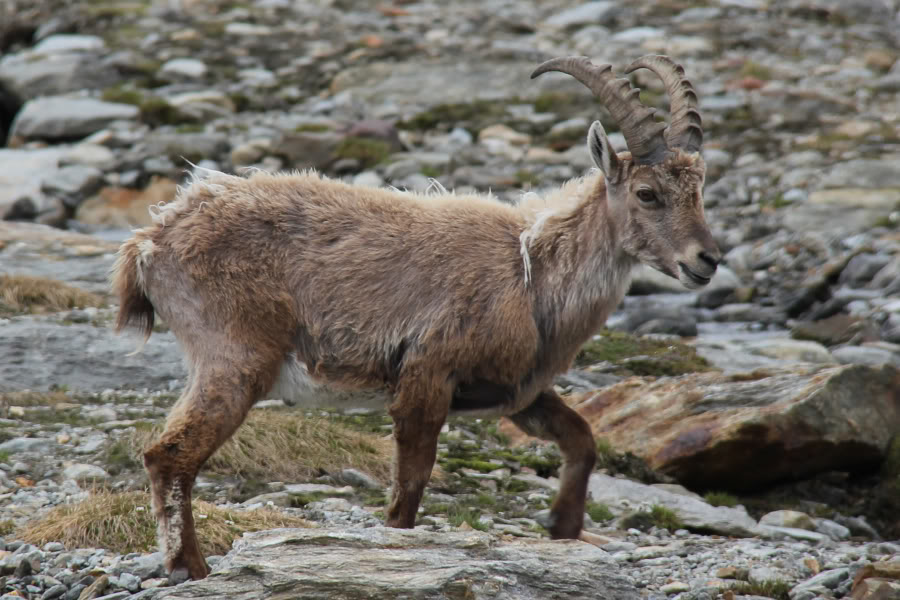
During the ascent to Hohsaas, it was great to get close to some Alpine Ibex.
We would have missed the Ibex had we taken the cable car up to Hohsaas.
Prior to going on the trip, I had debated whether or not to take my bulky, heavy DSLR with me. Getting close-ups
of the Ibex made it worth the effort.
Alpine Ibex:

… and again:
… and again:

Ascent towards Hohsaas cable car station:

As we approached Hohsaas, we began to get views of what lay ahead.
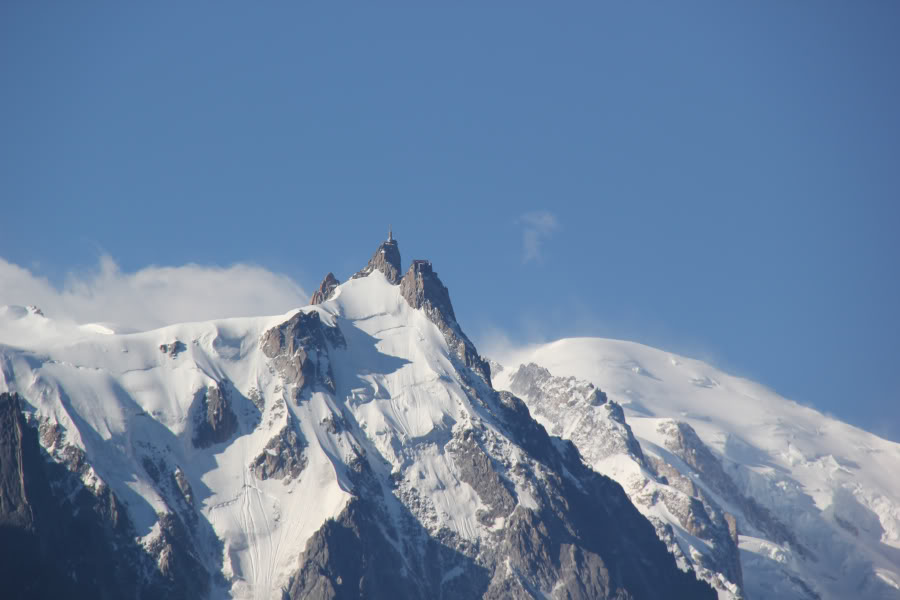
Weissmies across the Triftgletscher:

Hohsaas cable car station:

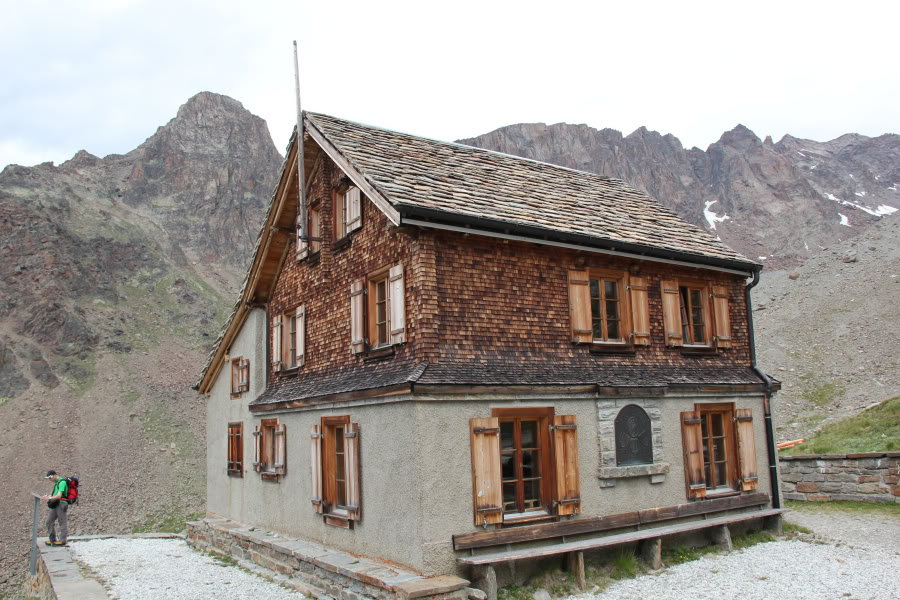
On reaching the Hohsaas hut (3098m), we deposited our bags in our room and then went out to check-out our forthcoming route.
Hohsaas hut and restaurant:

We watched a couple of groups descend from Weissmies; highlighting where we
would be ascending the following day. From a distance, some of the route
looked very steep.
From Hohsaas hut, watching two groups descend from the Weissmies:
From Hohsaas hut, watching group descend the Weissmies (zoom):

As time passed, the weather improved providing a good opportunity for some
additional photos of surrounding mountains.
Looking across to Rimpfischhorn, Alphubel and the Dom from the Hohsaas hut:

The Dom from the Hohsaas hut:

Weissmies from Hohsaas hut:

Approx. route up the Weissmies:

After an evening meal in the hut, it was off to bed. I had a sore head, I’m
guessing due to the height. At this point I should say mountain huts in
Switzerland are far from cheap. Expect to pay £6 for one bottle of water!
After a reasonable night’s sleep, and some breakfast, we set off a short time before 06:00 en-route to the summit.
After descending a short distance, to reach the edge of the glacier, we put on our crampons and Poldo attached us all to his rope.
Crampons on and getting roped-up for the ascent:

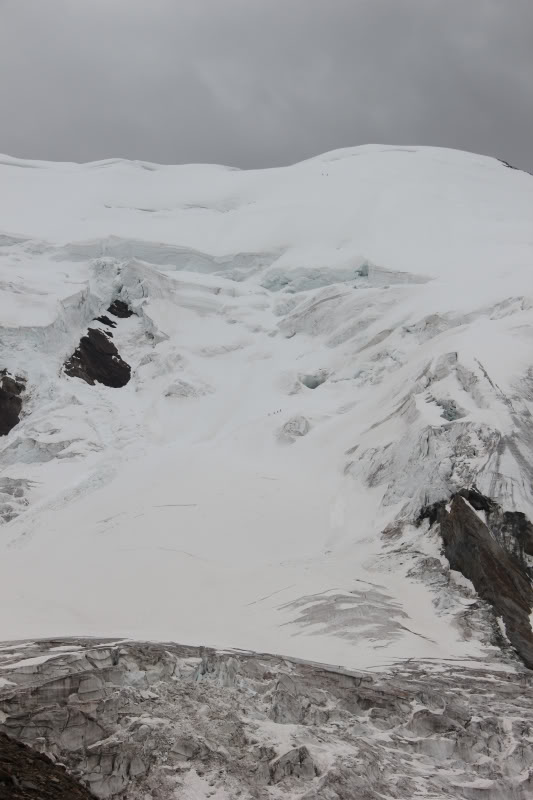
The crossing of the glacier was straight-forward compared with previous glacier crossings on my 2003 Alpine trip and what was to come in the days ahead. The crevasses were mostly obvious and easily avoided.
Crossing the Triftgletscher en-route to the Weissmies:

A crevasse:

During our ascent, we passed quickly below some seracs.
Steep ascent between seracs:

View towards the Lagginhorn:

Steep ascent below a serac:

More crevasses:

As we progressed up the mountain, it became a nice, sunny day.
Looking towards the summit of the Weissmies (three climbers already on the ridge):

During the final ascent to the summit, I was feeling a bit tired but it was great to reach the top
![]() .
.
Final ridge to the summit of the Weissmies:

Final ridge to the summit of the Weissmies:

At the summit, Poldo took some photos with each camera before we set off back down the mountain via the same route.
There was no hanging around with Poldo
![]() .
.
Summit photo:

View from summit of the Weissmies:

View from summit of the Weissmies:

We descended back to the Hohsaas hut via exactly the same route.
View during descent of the Weissmies:

Looking back towards the summit:

On reaching the Hohsaas hut, instead of walking all the way back down to Kreuzboden, we took the cable car back from Hohsaas to Saas-Grund. On reaching Saas-Grund we drove further along the valley for a look around Saas-Fee.
We had a celebratory lunch and beer in Saas-Fee which was expensive ![]() .
.